As promised here is the beginnings of my decorating. I don't decorate for Halloween. My really only explanation for that is I'm too cheap. I can get 2 months out of fall decorating verses 1 month, maybe, for Halloween. So with that said I have put out some of my fall decor. I may tweak a few things still but hopefully this will give you some new ideas to transform or revive some older decor that needs updating. Now, I don't claim to be an interior designer. Far from that title actually. I have been inspired by friends who are, but would also love feedback if another way would look cuter.

Now, I show you this picture because this is to show you that I have lost my mantel to this monstrosity. I mourned the day it was brought into my house to go in it's permanent home...MY MANTEL!! I see all these cute mantel photos and cry. I miss my mantel. But, my youngest plays the piano and it has become my replacement mantel. Any idea on how to decorate for fall around this beast would be greatly appreciated. Now on to some befores and afters. I will show all the different pieces I worked on then show how I put it all together. So bare with me, this is a long one.
This is a lovely picture of my nieces and their sweet momma. I love them and this picture. But the frame is what I need so the picture must find a new home for the fall season. Sorry girls, still love you!!
These are the materials I will be using in this frame. Some cute napkins I found at Hobby Lobby(50%) off!! The flower, well it was part of my fall flower collection from previous years. I took it off the stem and decided to use it to revamp the frame.
Here is what I did with all three objects. I love it. Whatcha think? A keeper? So, I wrapped the napkin around the cardboard that comes with the frame. I hot glued the flower on. Easy as that.
This is a cheese plate(I collect the domes to make mini cake plates with), and a bronze candlestick I spray painted creme. This idea is all over blog land and a dear friend does this in her house as well.
Here is how I used it. I painted it a golden yellow, already had the paint, and the sanded it a bit to give it a rustic look. I then hot glued the candle stick to it to give it some extra support. I didn't want a permanent hold or I would have used epoxy glue. You could put a candle on top, whatever, the sky is the limit!! You can find these two things at any thrift store, or buy any type of plate or circular piece of wood would work
too.
Ugly frames I bought from Savers. They were gold. But they were $2 so nothing a little spray paint can't fix!! I use old cardboard boxes to paint on.
This is the finished product. Again, the flowers were from years past. I wish I would have taken a separate picture of them but I forgot. I took the flowers off the stem and off the plastic this that holds the petals on. layered them back onto each other. I then wrapped burlap around the card board from the frames and put it all together. This look wasn't my actual thought, but my original thought failed and somehow this emerged. I really love it. I actually smiled when I realized my mistake turned out good.
My faux mantel before
My mantel after with all the elements added.
The frame up close
Another close up of the display
This is the front entry way, or part of it. I did the same thing with another flower to this frame.
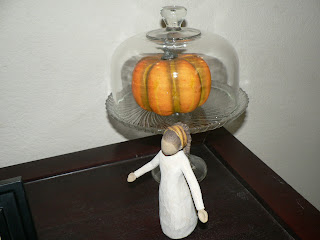
You know how I said I collect cheese domes. Well here is an example of what I do with them. ps: I collect Willow Tree too. :D
A view of the flower frames. I think I am going to go buy plates or something to put on either side. Make it more substantial. The pillow was a birthday gift and I just love it. Again, made from burlap!!
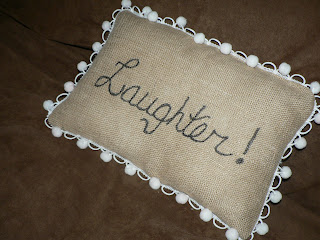
The pillow close up!! Isn't it lovely. In case you didn't know burlap is very trendy right now. And in case you didn't know, burlap is very CHEAP!!!!!!
I hope you like what I have done so far. I think this has been the longest blog post of my blogging life so far. Hope you were able to stick through it and enjoy. As I tweak and decorate more I will post those. Happy Harvest decorating!!!


