Saturday, December 4, 2010

December 4th-Mantel Idea


My friend Charity emailed me her mantel this morning.  The picture looked better on my computer than it uploaded.  I'm in love with everything about it.  It makes me want to redo mine even though she helped me with mine and I love mine. I wanted to highlight the frame with vases in front.

This is how she made this little section of her mantel look amazing!!! 
 

(Old frame, scraps of ribbon, old ornaments, and random pieces of greenery and flowers.  It's just hot glued onto the frame and leaning against the wall.  I think it makes such a pretty backdrop.  I backed this one with burlap, but without the burlap it could be hung on a door as a wreath, or even mounted on the wall somewhere. 
So, that's my easy and cheap holiday decor idea.)

Thanks for sharing Charity!!  Hope this inspires you some more to get creative with what you have already in the house or the years of holiday decor stored in the attic.  Pull it out and get busy!!

Kelly

Friday, December 3, 2010

December 3rd-2 for 1, A gift and decor


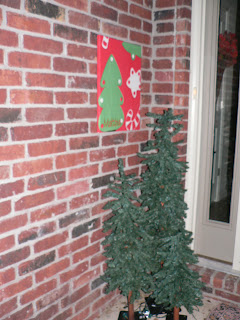
A few years back a friend bought me this huge napkin if that is what one would call it.  It was Christmas themed and she had it embroidered with our name on it.  I loved it, no, I LUUUUVED it.  Never quite knew what to do with it until now.


I had a old canvas that was even painted on, but I staple gunned the napkin to it and hung it outside by the trees.  I think it adds a little extra something to the corner.  I used heavy duty all weather tape that you can find at Walmart in the hardware section.  Again, for me it was free, but getting this embroidered was probably under $10 if you find something similar at a store.  I hope this helps you think outside the box a little, whether you buys napkins and embroider them for someone this year or decorate with them.

Kelly

Thursday, December 2, 2010

December 2nd-Decorating with vases, garland, and ornaments

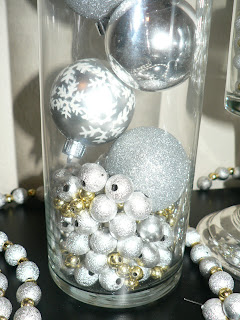
My goal this year with decorating was to repurpose things that I already had.  I didn't want to "have" to buy many new decor items and that is why I love having creative friends.  They may see something in a different light than me and what they come up with is MAGIC!!  Here is an example of what you can do with some old jars, vases, candle holders, etc, some garland and ball ornaments. 


this is how the project turned out


Candle stick were used as base under the vases to give some height
All of these candle sticks I found at Flea Markets for cheap.  Do not pay more than $2 for them!
Keep searching and you will find them for $0.50 maybe $1.  Once you find them this cheap you will turn your nose up at pricier ones.  
A strand of garland was cut apart and the ball were placed in the jar with some ball ornaments.
I'm learning that layering is good when putting objects into jars.


This is really a easy fix if you need something new to for your decor this year.  The vases, balls, garland, were all something I had already.  The 2 candlesticks I found at Savers and a flea market.  I paid maybe a total of $3 for both.  Think about what you can alter.  Don't be afraid to cut things apart.  Get in there and revamp old decor into something MAGICAL!!
Until tomorrow...

Kelly


Wednesday, December 1, 2010

December 1st-Decorating with Silver Chargers

This idea, I really can't claim, but I loved it so much I wanted to share it with you all.  My Charity came over to help me duplicate a Pottery Barn mantel(saving for another post), and proceeded to work her magic on the rest of the house.  She brought over some silver chargers(you can find these at Hobby Lobby for like $10) and we used them to decorate with.
This is one of the ideas...


the silver charger, aka my blank slate

one has Peace on it and the other Joy


I cut the words out using my Cricut on some cheap contact paper(shelf liner).  You can get a huge roll at Walmart for next to nothing.  I'm too cheap to use my good vinyl on something I will remove once Christmas is done.  If you don't have a Cricut you can also print out the font you want on the computer and cut and trace onto the contact paper.  Because these were borrowed charges, FREE, and the letters cost me pennies to cut out.  I have them tacked onto the wall using the 3M Velcro( Velcro strips )tabs.  I just adore this wall.  Thanks to my Charity for your inspiration on this one.  PS:  She did the mirror and wreath too but I will post more on that another day.  Post links to your blog to share your inexpensive Decorating or gifting ideas!!
 
Happy Holiday Decorating!!
 
Kelly


Tuesday, November 30, 2010

25 Days until Christmas!!

Starting tomorrow, December 1st I will begin posting either inexpensive ideas for decorating or gifts.  If you have a project or handmade gift you would like to share include a link to your blog or if you don't have a blog email a picture and tutorial to me and I will post it.  I know I need new ideas so please share with us all.  Here's to the Christmas count down!!

Kelly

Sunday, November 28, 2010

Sale at My Etsy Shop!!

You can find the link to my Etsy shop on the right hand side.


STARTING AT 12:00AM MONDAY, NOVEMBER 29... ENTER COUPON CODE (TCCCYBERMONDAY) TO RECEIVE 30% YOUR ORDER. 
PURCHASE MORE THAN ONE ITEM AND RECEIVE FREE SHIPPING ON THE SECOND ITEM. 
IF YOU SEE SOMETHING YOU LIKE, BUT WANT A SIMILAR ITEM CUSTOMIZED WITH MONOGRAM, COLORS, ETC PLEASE LET ME KNOW.  GIFT WRAPPING AND SHIPMENT TO DIFFERENT ADDRESS AVAILABLE UPON REQUEST

Wednesday, November 10, 2010

Coming Soon!

New crafts to come with in the week.  I have been busy getting some things together for an Holiday Open House that a friend of mine is hosting.  Lots of fun crafty things you can whip up for a very little amount out of your pocket.  Until then...

Tuesday, October 12, 2010

Pardon My Messy Blog

Pardon me while I get my blog back to the way it was.  I was messing around with templates today and this is what happened.  : ( !!!! 

Kelly

Friday, October 8, 2010

Fall Decorating

As promised here is the beginnings of my decorating.  I don't decorate for Halloween.  My really only explanation for that is I'm too cheap.  I can get 2 months out of fall decorating verses 1 month, maybe, for Halloween.  So with that said I have put out some of my fall decor.  I may tweak a few things still but hopefully this will give you some new ideas to transform or revive some older decor that needs updating.  Now, I don't claim to be an interior designer.  Far from that title actually.  I have been inspired by friends who are, but would also love feedback if another way would look cuter.


Now, I show you this picture because this is to show you that I have lost my mantel to this monstrosity.  I mourned the day it was brought into my house to go in it's permanent home...MY MANTEL!!  I see all these cute mantel photos and cry.  I miss my mantel.  But, my youngest plays the piano and it has become my replacement mantel.  Any idea on how to decorate for fall around this beast would be greatly appreciated.  Now on to some befores and afters.  I will show all the different pieces I worked on then show how I put it all together.  So bare with me, this is a long one. 


This is a lovely picture of my nieces and their sweet momma.  I love them and this picture.  But the frame is what I need so the picture must find a new home for the fall season.  Sorry girls, still love you!!


These are the materials I will be using in this frame.  Some cute napkins I found at Hobby Lobby(50%) off!!  The flower, well it was part of my fall flower collection from previous years.  I took it off the stem and decided to use it to revamp the frame.


Here is what I did with all three objects.  I love it.  Whatcha think?  A keeper?  So, I wrapped the napkin around the cardboard that comes with the frame.  I hot glued the flower on.  Easy as that. 


This is a cheese plate(I collect the domes to make mini cake plates with), and a bronze candlestick I spray painted creme.  This idea is all over blog land and a dear friend does this in her house as well.


 Here is how I used it.  I painted it a golden yellow, already had the paint, and the sanded it a bit to give it a rustic look.  I then hot glued the candle stick to it to give it some extra support.  I didn't want a permanent hold or I would have used epoxy glue.  You could put a candle on top, whatever, the sky is the limit!!  You can find these two things at any thrift store, or buy any type of plate or circular piece of wood would work
too.


Ugly frames I bought from Savers.  They were gold. But they were $2 so nothing a little spray paint can't fix!!  I use old cardboard boxes to paint on. 


This is the finished product.  Again, the flowers were from years past.  I wish I would have taken a separate picture of them but I forgot.  I took the flowers off the stem and off the plastic this that holds the petals on.  layered them back onto each other.  I then wrapped burlap around the card board from the frames and put it all together.  This look wasn't my actual thought, but my original thought failed and somehow this emerged.  I really love it.  I actually smiled when I realized my mistake turned out good.


My faux mantel before


 My mantel after with all the elements added.

The frame up close
 
Another close up of the display


This is the front entry way, or part of it.  I did the same thing with another flower to this frame.


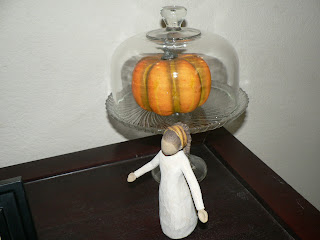
You know how I said I collect cheese domes.  Well here is an example of what I do with them.  ps:  I collect Willow Tree too.  :D


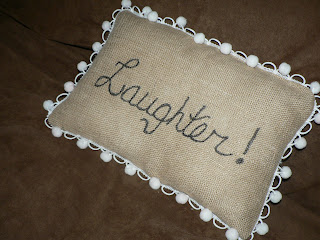
A view of the flower frames.  I think I am going to go buy plates or something to put on either side.  Make it more substantial.  The pillow was a birthday gift and I just love it.  Again, made from burlap!!


The pillow close up!!  Isn't it lovely.  In case you didn't know burlap is very trendy right now.  And in case you didn't know, burlap is very CHEAP!!!!!!


I hope you like what I have done so far.  I think this has been the longest blog post of my blogging life so far.  Hope you were able to stick through it and enjoy.  As I tweak and decorate more I will post those.  Happy Harvest decorating!!!

Monday, October 4, 2010

Ballard Inspired Bathroom Trash Can


My boys' trash can for their bath is stainless steel.  No matter how much I clean it, it never looks like it did when I bought it.  I am new to the Ballard world, but saw this trash can and knew I could copy it.  It may not look as tailored but it will do the job for now.  I already had all the materials needed to make this so away I went.  It took me all of 30 minutes to make it.  You will need burlap, paint, stencil, ribbon and glue gun.  If you have an old trash can that needs revamping try this. 
Ballard's Bathroom Line

I am linking to:

The Girl Creative
Making

Wednesday, September 15, 2010

Scraps N' Strings: Picture Plaques with Mod Podge Dimensional Magic + Giveaway

Scraps N' Strings: Picture Plaques with Mod Podge Dimensional Magic + Giveaway

I hope I win!! Dimensional magic looks so cool!!

Aprons are Fun part 2

Like I said, I have a bunch of nieces.  This apron was for my Cheeky Monkey.  Different than my previous one.  The colors and patterns reminded me of her.  Again, just followed the pattern.

Wreath Challenged

I am a crafter.  I love flowers.  I love wreaths.  All three things should add up to a beautiful thing called a wreath, but a las I CAN'T DO WREATHS!!  I have tried and tried to make them.  I refuse to pay for them, when I KNOW I can make them cheaper.  My self esteem gets shattered every time I attempt my fate at making wreaths.  Years of feeling like a crafting failure have plagued me. "How can I make my door pretty?" I would always ask myself.
My solution came while taking a walk last fall.  A house in our neighborhood had a hanging basket full of flowers on her door.  It was beautiful.  I even whipped out my cell phone to take a picture I was so inspired.  This I can do!  My self esteem and hopes of a beautiful fall door were back.  I rushed to Michaels and Hobby Lobby to search for baskets and flowers on sale.  From that point on I have only had my metal basket(if you can call it that) and seasonal flowers on my door.  This spring and summer I did wild flowers.  Oh, I loved my door, and actually was a little sad to take them down.  But my favorite of all seasons, FALL, is back and so I have pulled out my fall flowers from the attic and placed them in their rightful place.  My front door.  Ahhhh, I love fall decorating.  If you are like me and are wreath challenged, try this idea out.  Happy Harvesting!!


I aM LinKinG tO:
Visit thecsiproject.com 


Tuesday, September 7, 2010

Vinyl monogramed frame

I bought this frame from a friend's yard sale.  It originally had an abstract type picture in it, but I bought it for the frame.  I have had this since the summer and wanted to personalized it for our living room.  I bought a HUGE "M" from Joanns years ago and was going to put it  in the middle of it, but once I discovered using vinyl on glass I knew that was what I was going to do.  I glued the glass down with an epoxy glue.  Hope you enjoy it and make one for you home smaller or bigger.


I am linking to


Friday, September 3, 2010

Random Thoughts


I know this has nothing to do with anything about crafting, but maybe I can squeeze it into the reviving category.  I went to the gym to take my cardio dance class-hence the revival part-and I thought, "the music isn't quite moving me today."  Strange.  I love to sing while I dance, joke around with my friend Jill.  Nope just didn't feel it.  I didn't even want to try to make my big gluteous maximus look good while dancing to a Sean Kingston song.  I did get into a song towards the end of class and again thought, "Man I wish I could rap."  I can't rap and because I can't rap I can't sing along to the song.  Or rap along.  It has just been one of those days where I think, where has the joy gone today?  Maybe I should just stick with crafting.  I guess you can't have it all.  I hope today you are not in need of a revival and have accomplished all you set out to do. 

Thursday, September 2, 2010

Name Tag Zipper Pull

I thought my oldest was too old to get his back pack embroidered with his name on it so I came up with this zipper pull.  I used our old pool passes from last summer, mod podge, scrap paper, and an image of a saxophone player from online.


I put Mod Podge on the entire thing before putting down paper.
A second layer of paper and his name went down.  Mod Podged over both layers.

He will be playing sax this year so I cut this clip art out and layered it with black.


Drilled a new hole and used a key ring to put it on his bag.  Hopefully it's cooler than embroidery.  ; )


I am linking to this Party